Salesforce Booking Page Integration
To enhance Apptoto’s Salesforce integration, we’ve made it possible to convert Salesforce leads to Salesforce opportunities automatically. Now, after a Salesforce lead books an appointment with you via an Apptoto booking page, you can choose to have them convert to an opportunity instantly.
Converting a Salesforce lead to an opportunity after an appointment booking
Section titled “Converting a Salesforce lead to an opportunity after an appointment booking”-
If you have not already, be sure to sync your Salesforce Calendars to Apptoto
-
Add your Salesforce Leads Address Book to Apptoto
-
Navigate to the Booking Page tab in Apptoto.
-
Set your booking page settings (such as appearance, appointment types, form fields, etc.) as needed.
-
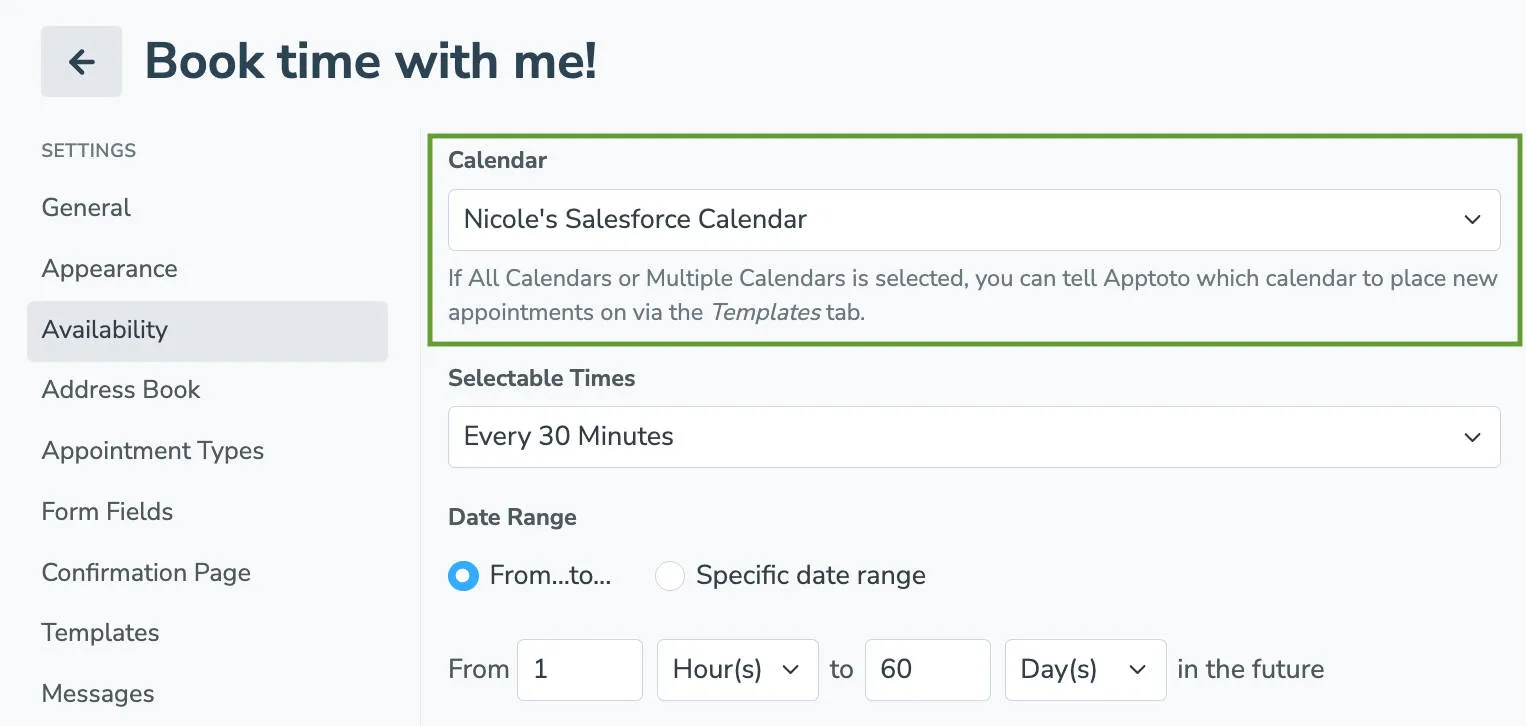
On the Availability tab, ensure your Calendar is set to sync to a Salesforce Calendar.
-
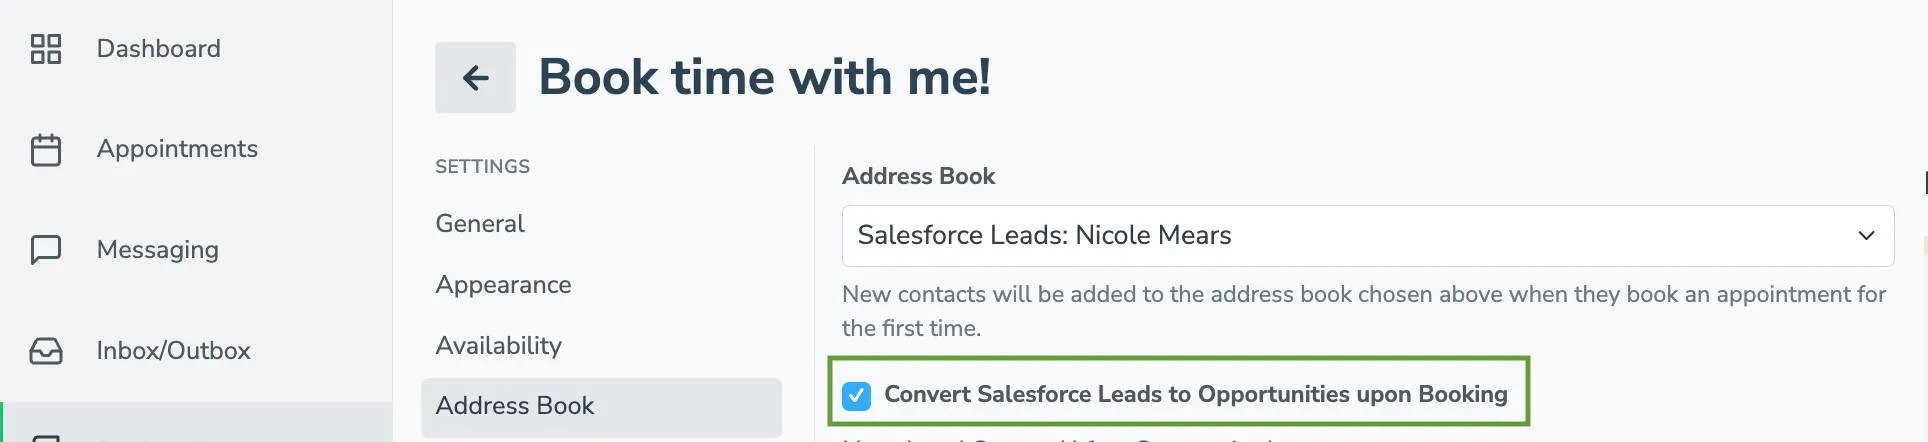
On the Address Book tab, set your Address Book to your Salesforce Leads address book you synced in step 2.

-
After you complete the previous step, a checkbox will appear. Click the checkbox to enable Convert Salesforce Leads to Opportunities upon Booking.
-
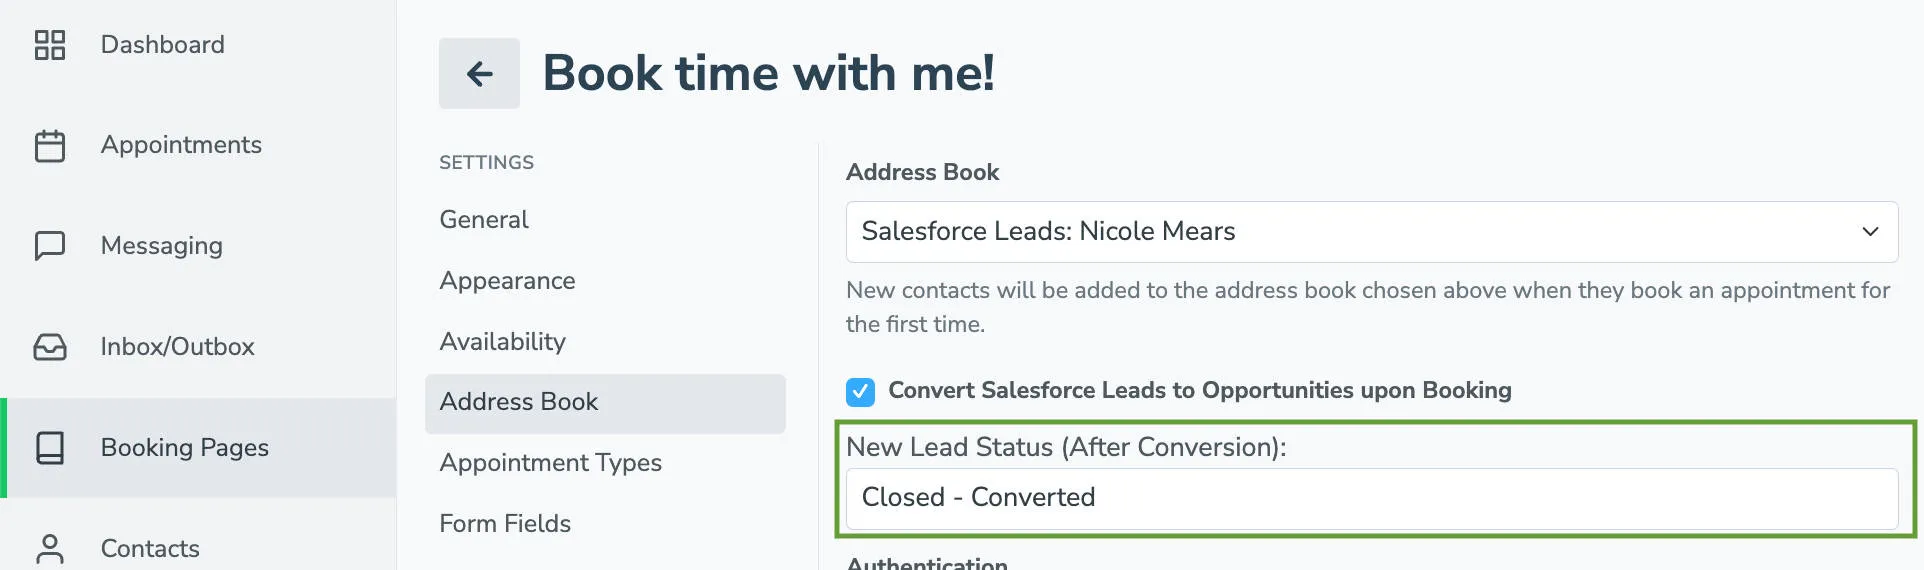
A New Lead Status (After Conversion): field will appear. Enter the name your business uses when a qualified lead is converted to an opportunity in Salesforce.
-
Click Create to launch your new booking page.
Identifying the name for a converted lead in Salesforce
Section titled “Identifying the name for a converted lead in Salesforce”- Login to Salesforce
- Navigate to Setup tab then Object Manager.
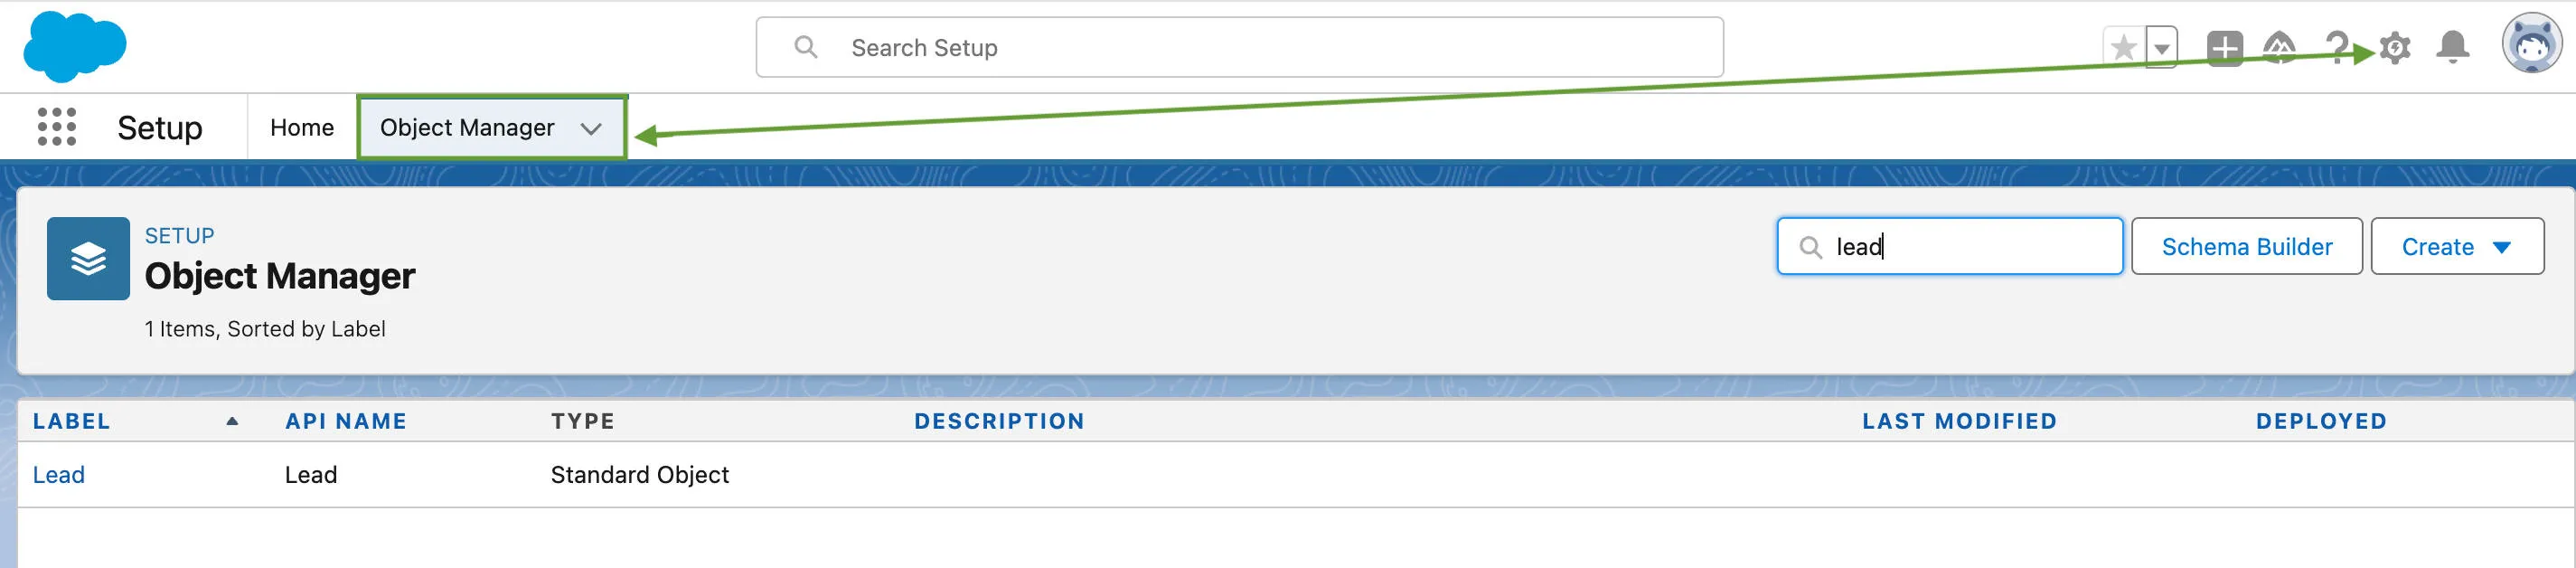
- Click on the Lead object to see more details.
- Select the Fields & Relationships tab and search for the Lead Status field.
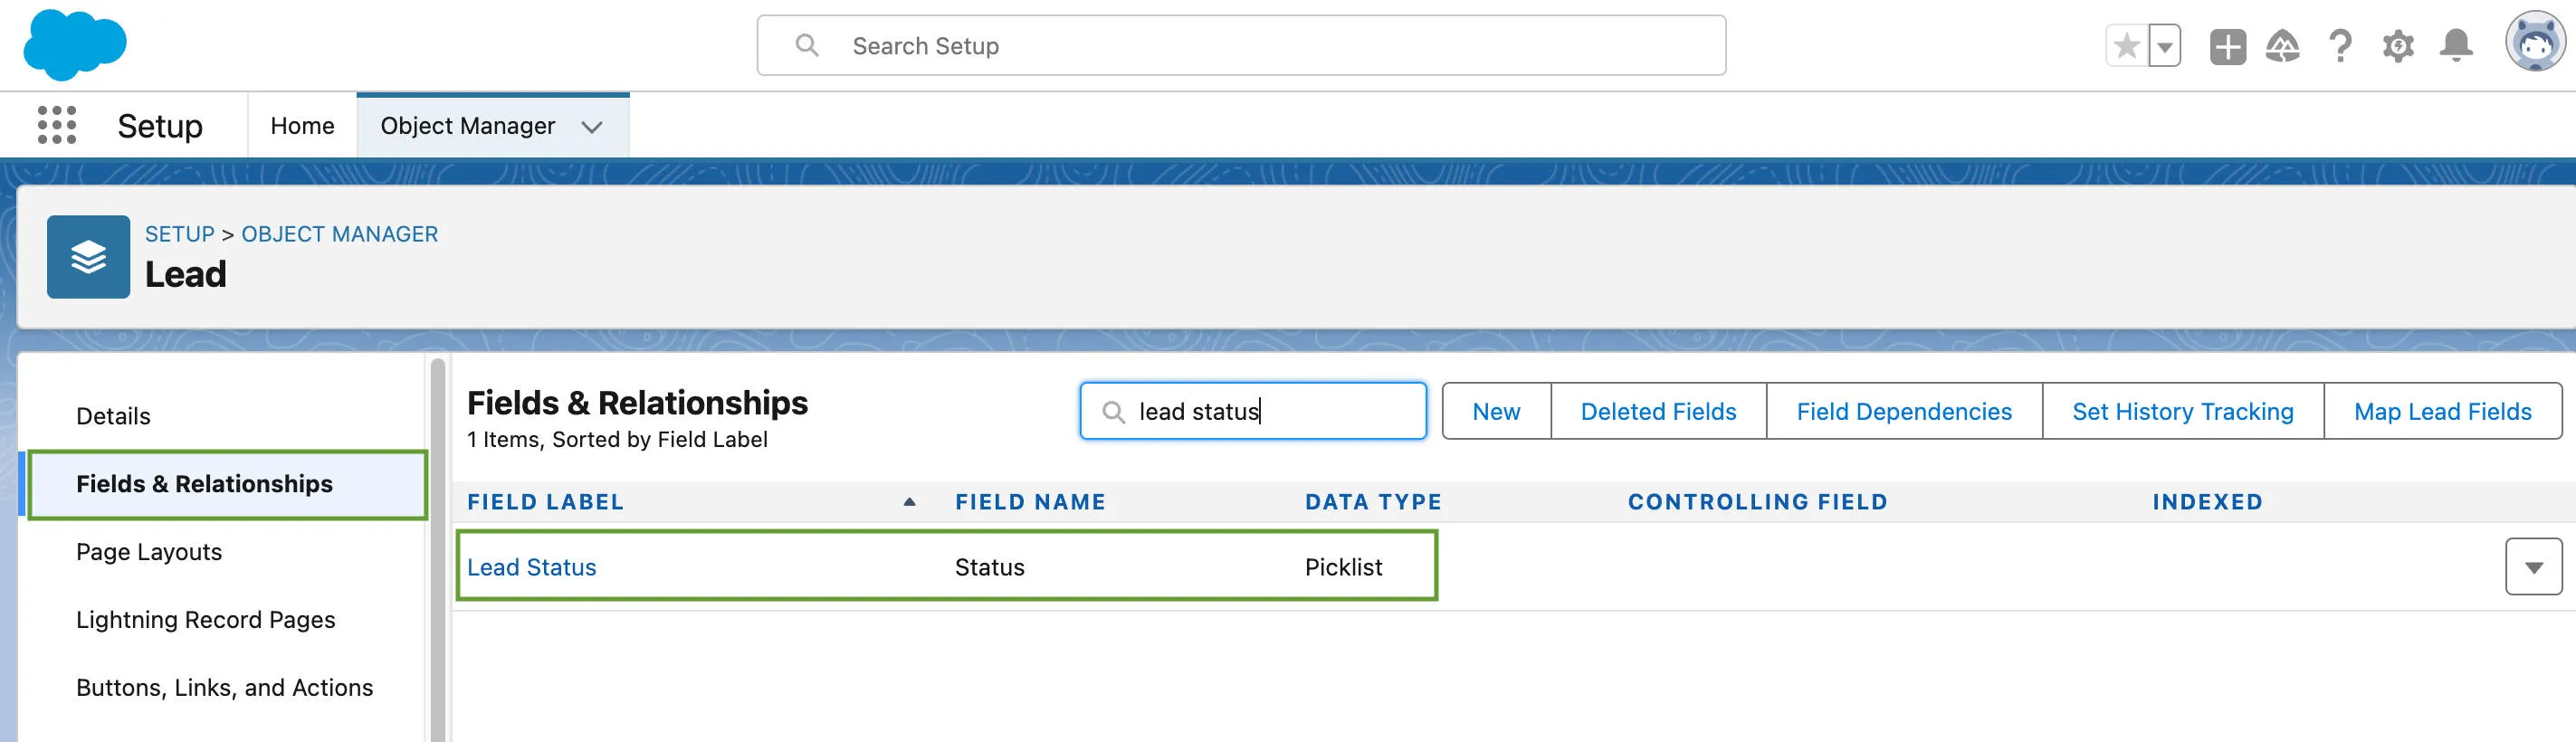
- Click on the Lead Status field and scroll down to the Lead Status Picklist Values.
- In the picklist, one Value/API Name should have a checkmark in the “Converted” column.
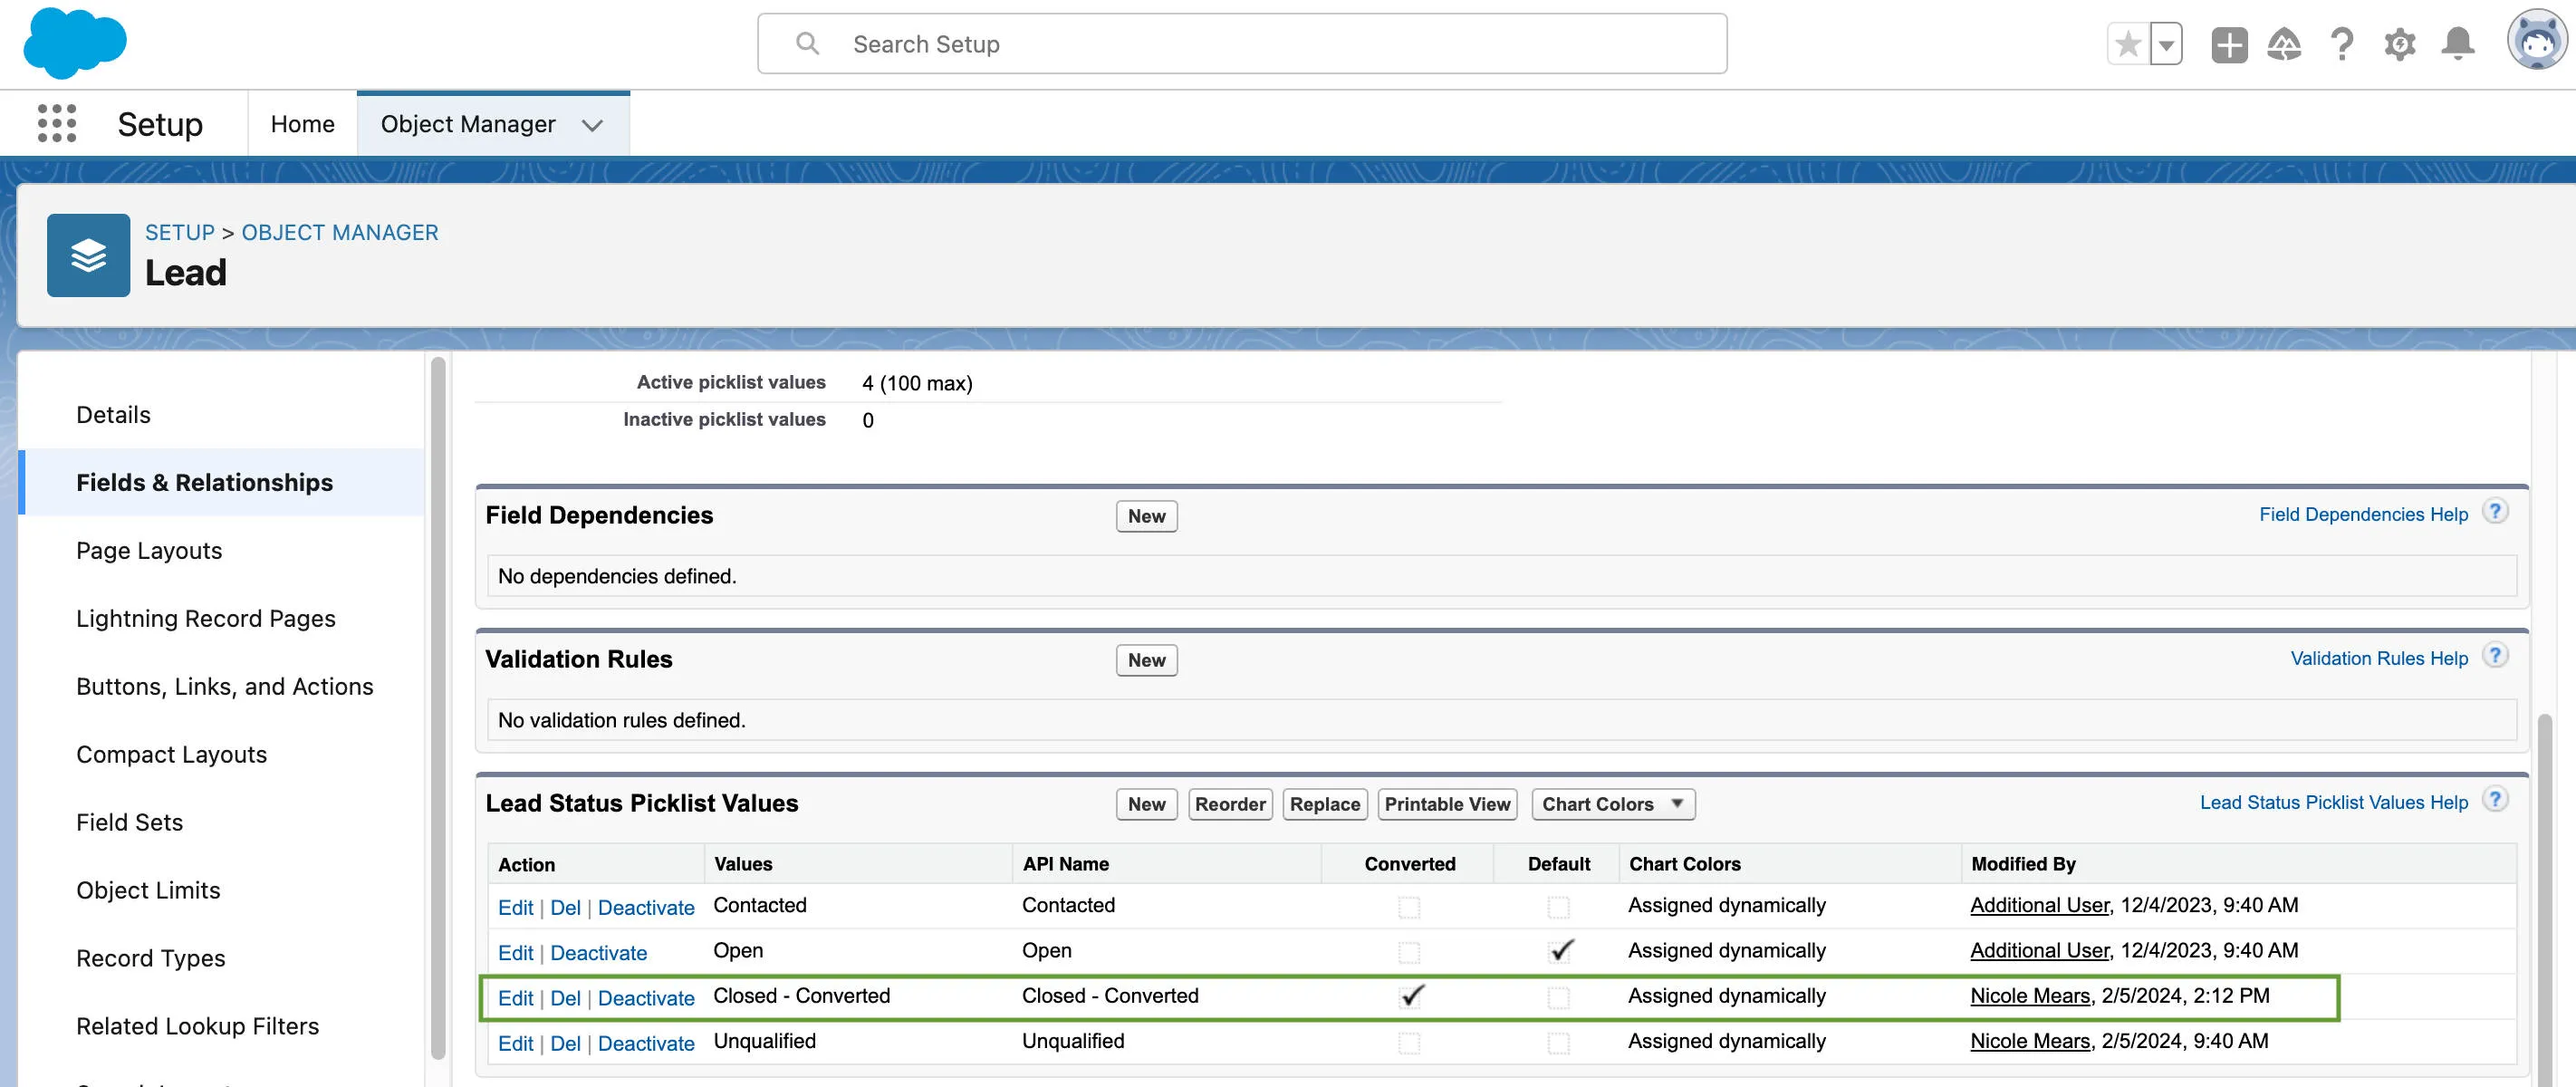
- Enter the API Name into the “New Lead Status (After Conversion):” in Step 8 above.