Connecting Microsoft Exchange
Apptoto connects to Microsoft Exchange through a Sync Agent — a Windows application you install on a computer that stays running. The Sync Agent communicates between your Exchange server and Apptoto, automatically syncing calendars and address books once per hour.
Before you start
Section titled “Before you start”You will need
- Your Exchange server’s Exchange Web Services URL (e.g.
http://ourmail.ourcompany.com/EWS/Exchange.asmx) - A username and password for an Exchange user with access to the calendars or address books you want to sync
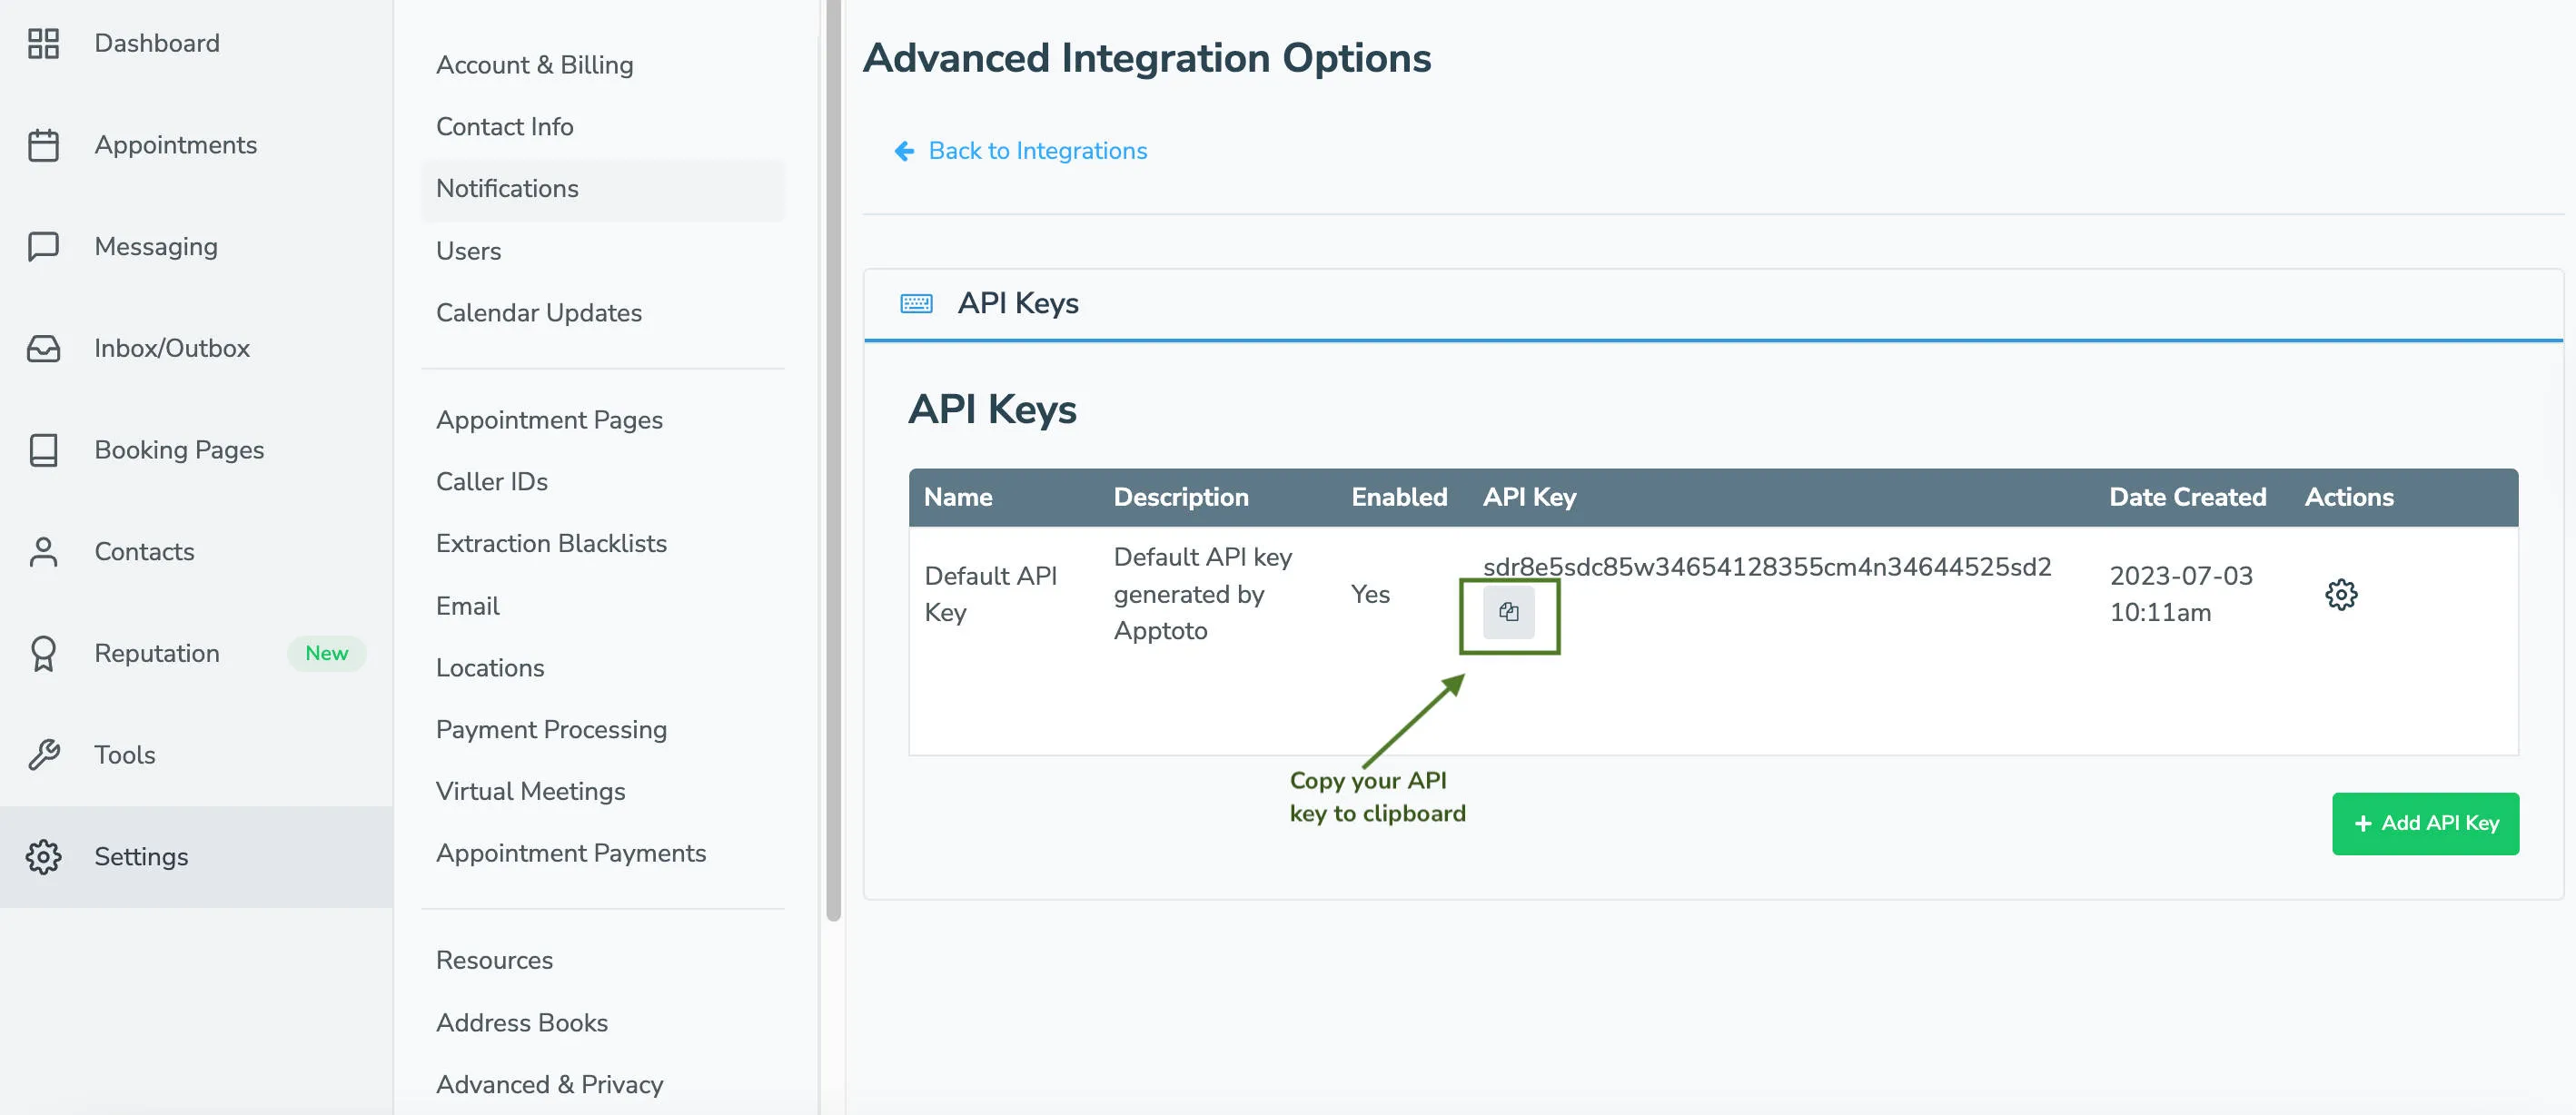
- Your username, password, and API key for an Apptoto account. (Find or create an API key at Settings > Integrations > Developer Tools > API Keys)
Installation
Section titled “Installation”-
Download and run the installer. Email support@apptoto.com for instructions on downloading the
setup.exefile, then run the installer. -
Run Apptoto Sync Agent. Run Apptoto > Apptoto Sync Agent from the Windows Start menu, or run
C:\Program Files (x86)\Apptoto\ApptotoAgent\ApptotoTray.exedirectly. -
Log into Apptoto. Use your API Key in place of the password. The API Key is located on the Settings > Integrations tab in the API Keys section. This keeps Apptoto connected even if you update your Apptoto password.
-
Configure your Exchange connection. Enter the username and password for the Exchange user with access to the calendars and address books you want to sync. No data will sync after this step — you’ll select which calendars to sync below.
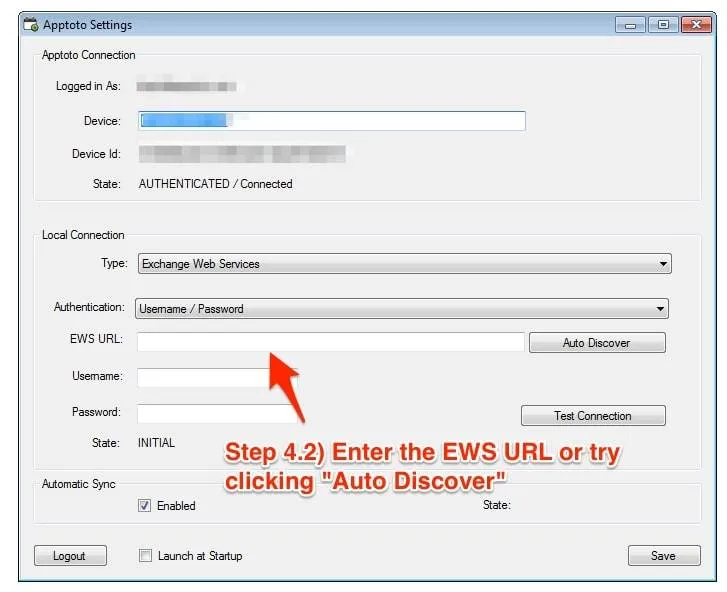
Enter your EWS URL or click Auto Discover if your organization supports auto-discovery. The EWS URL typically follows the form
https://server/EWS/Exchange.asmx. Replaceserverwith your Exchange server’s DNS name, usually found in Outlook settings or matching your Outlook Web Access (OWA) URL.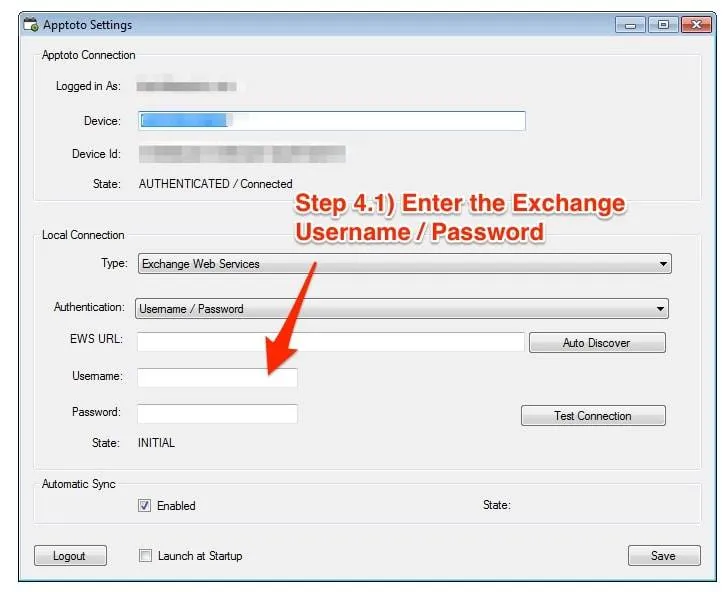
-
Test connection and save. Click Test Connection. If successful, click Save. Consider checking Launch at Startup to ensure the agent runs after restarts.
-
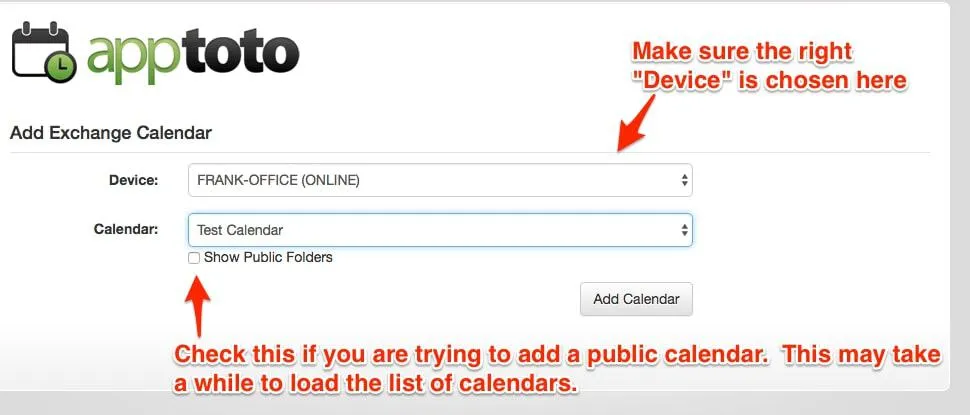
Add Calendars and Address Books. Navigate to https://www.apptoto.com/portal, click Settings > Calendars, then click Add Calendar. Choose Exchange and ensure the correct Device is selected while the calendar dropdown loads.
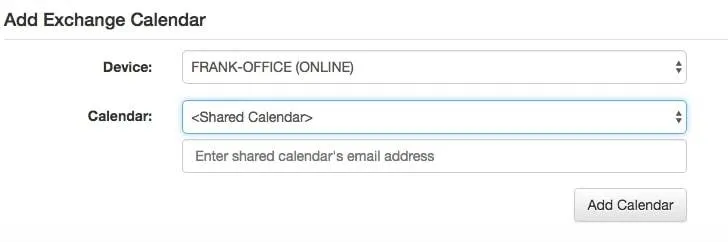
For public calendars, check Show Public Folders (may take time to load). For shared calendars, select the owner from the dropdown or enter their email address.
-
Check sync status. After connecting an Exchange Calendar, check its sync status on the Apptoto website under Settings > Calendars. Click Sync to trigger an on-demand sync.

Running multiple sync agents on one machine
Section titled “Running multiple sync agents on one machine”To sync different calendars with different Apptoto accounts:
- Create a shortcut to
c:\program files (x86)\Apptoto\ApptotoAgent\ApptotoTray.exe. - Set command line arguments to
--profile <name>(e.g.second). - Start the agent using that shortcut and log into the second account.
Create as many shortcuts with different profile names as needed.
Running Sync Agent as a Windows Service
Section titled “Running Sync Agent as a Windows Service”For version 2.0.17 and later, check Run as Windows Service in Settings and click Save.
For earlier versions:
- Close the Sync Agent from the system tray.
- Open Command Prompt and
cdtoc:\Program Files (x86)\Apptoto\ApptotoAgent. - Run
ApptotoService.exe -install. - Click Yes when prompted.
- Open Services management and set the Apptoto Sync Agent Service to start Automatically (Delayed Start).
- Manually start the service the first time.
Updating Exchange username and password
Section titled “Updating Exchange username and password”If you’ve enabled Run as Windows Service, you can skip these steps. Otherwise:
- Click the Apptoto icon in the system tray (or launch from Start Menu).
- Enter new username and password.
- Click Save.
- If running as a Windows Service, repeat the installation steps above.
Troubleshooting
Section titled “Troubleshooting”The Sync Agent won’t let you log into Apptoto.
Check that your firewall doesn’t prevent outbound connections from the Apptoto Sync Agent process.
Apptoto won’t connect to Exchange.
- Verify the EWS URL is correct by opening it in a browser and logging in.
- Check the log file at
%APPDATA%/Local/Apptoto/log.txtfor error details.
For more, see Exchange/SQL Sync Agent Troubleshooting.