Caller ID Number Hosting
Host your existing landline phone number with Apptoto so it appears on caller ID for SMS and voice messages.
If you want to use your existing landline number for both SMS and voice, you can port it to Apptoto through the number hosting process. This will allow you to send SMS and voice messages with your company’s phone number appearing on your client’s or patient’s caller ID.
If your number is currently hosted by another provider, you must revoke that hosting before starting this process.
Number Hosting
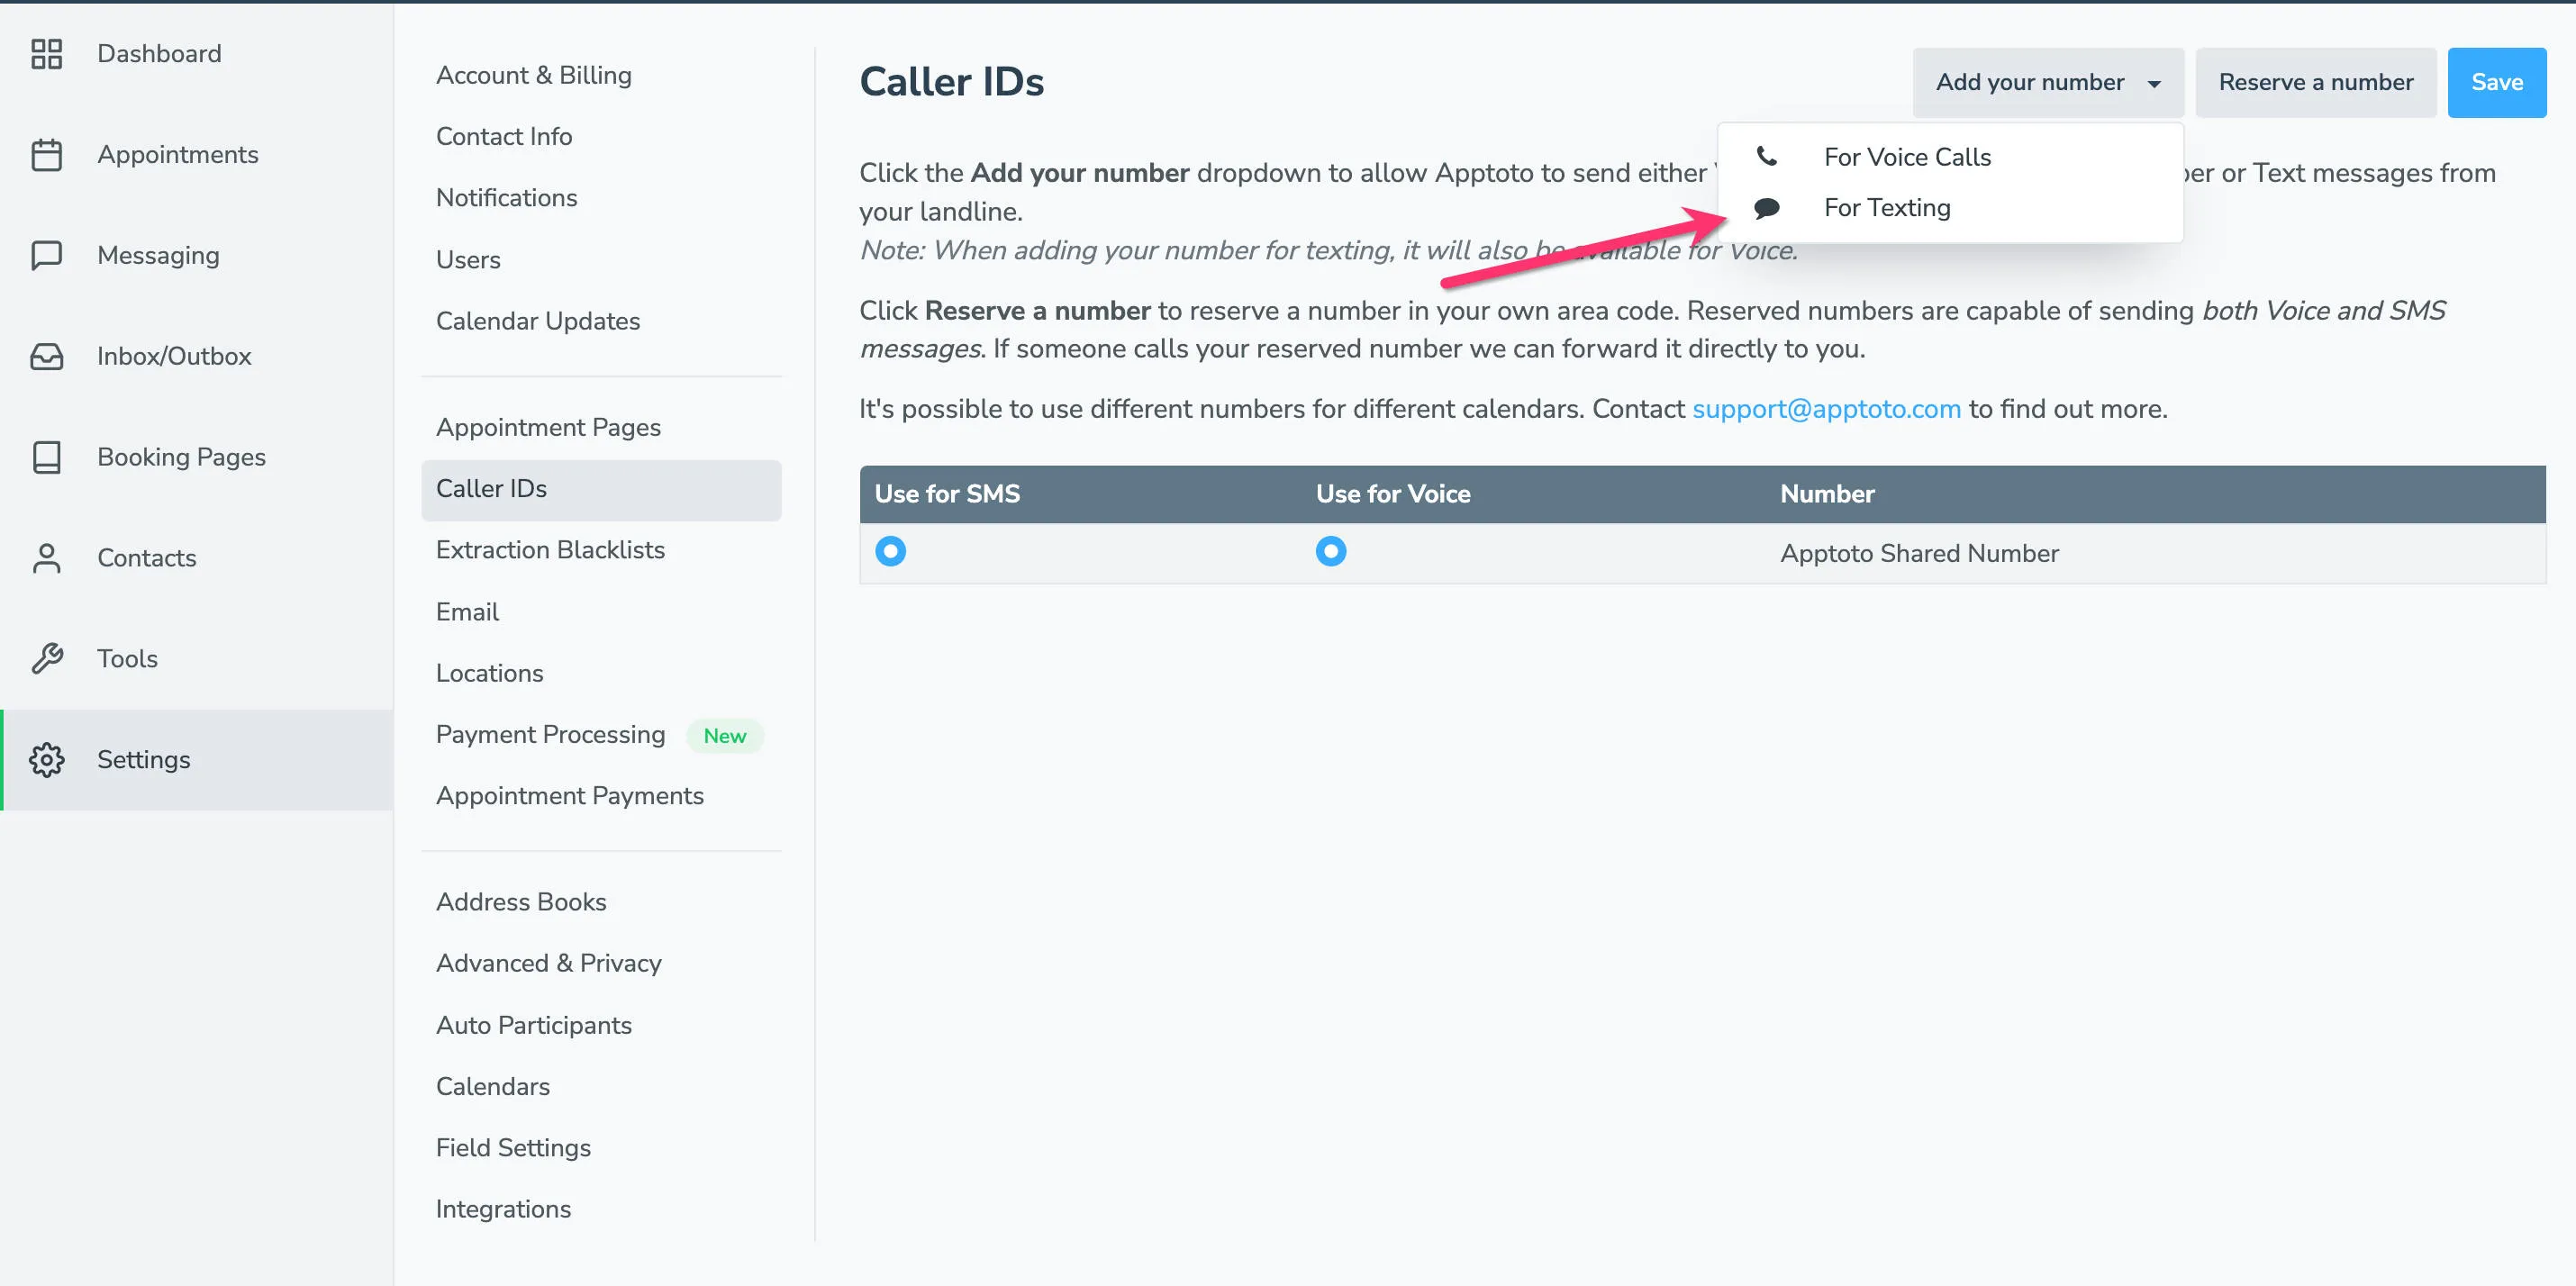
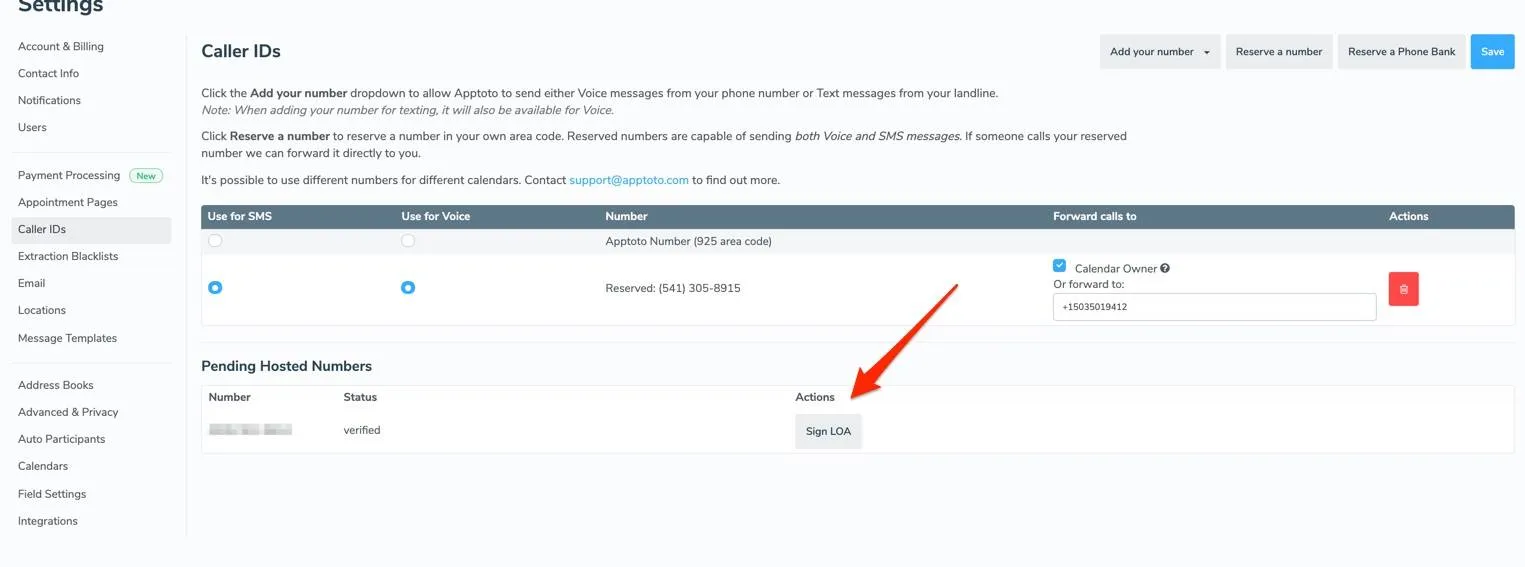
Section titled “Number Hosting”- Start the hosting request: Go to Settings > Caller IDs, click Add your number, then choose For Texting.
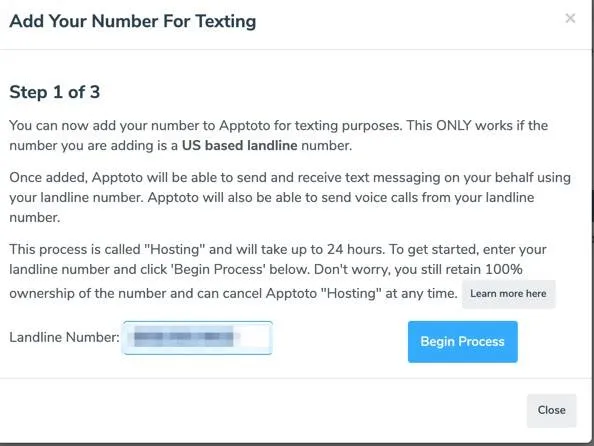
- Enter your landline number: Enter your landline phone number and click Begin Process. The number appears in your Pending Hosted Numbers list.
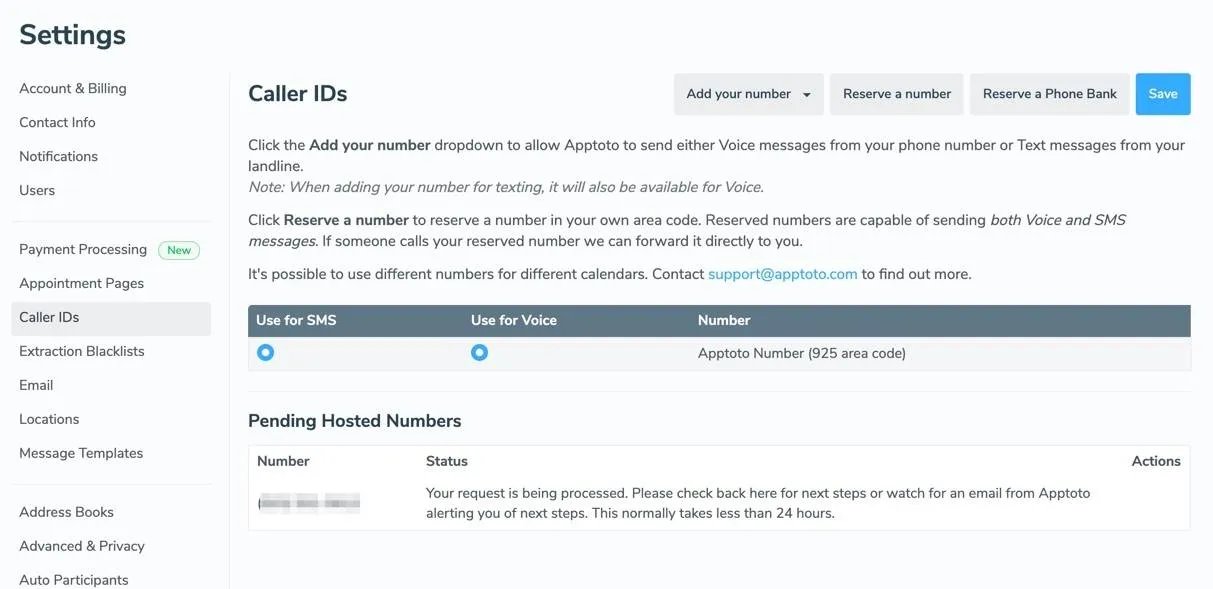
- Wait for verification eligibility: Apptoto checks whether the number can be hosted. If it can, the status changes to Received and you receive an email to proceed. If not, the status shows Failed and you receive an email with details.
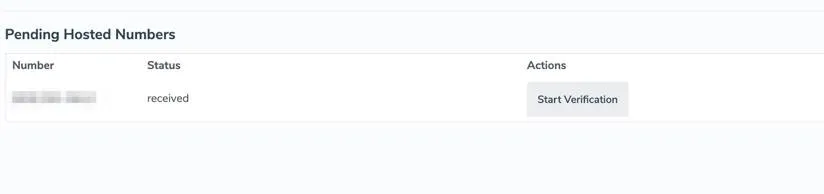
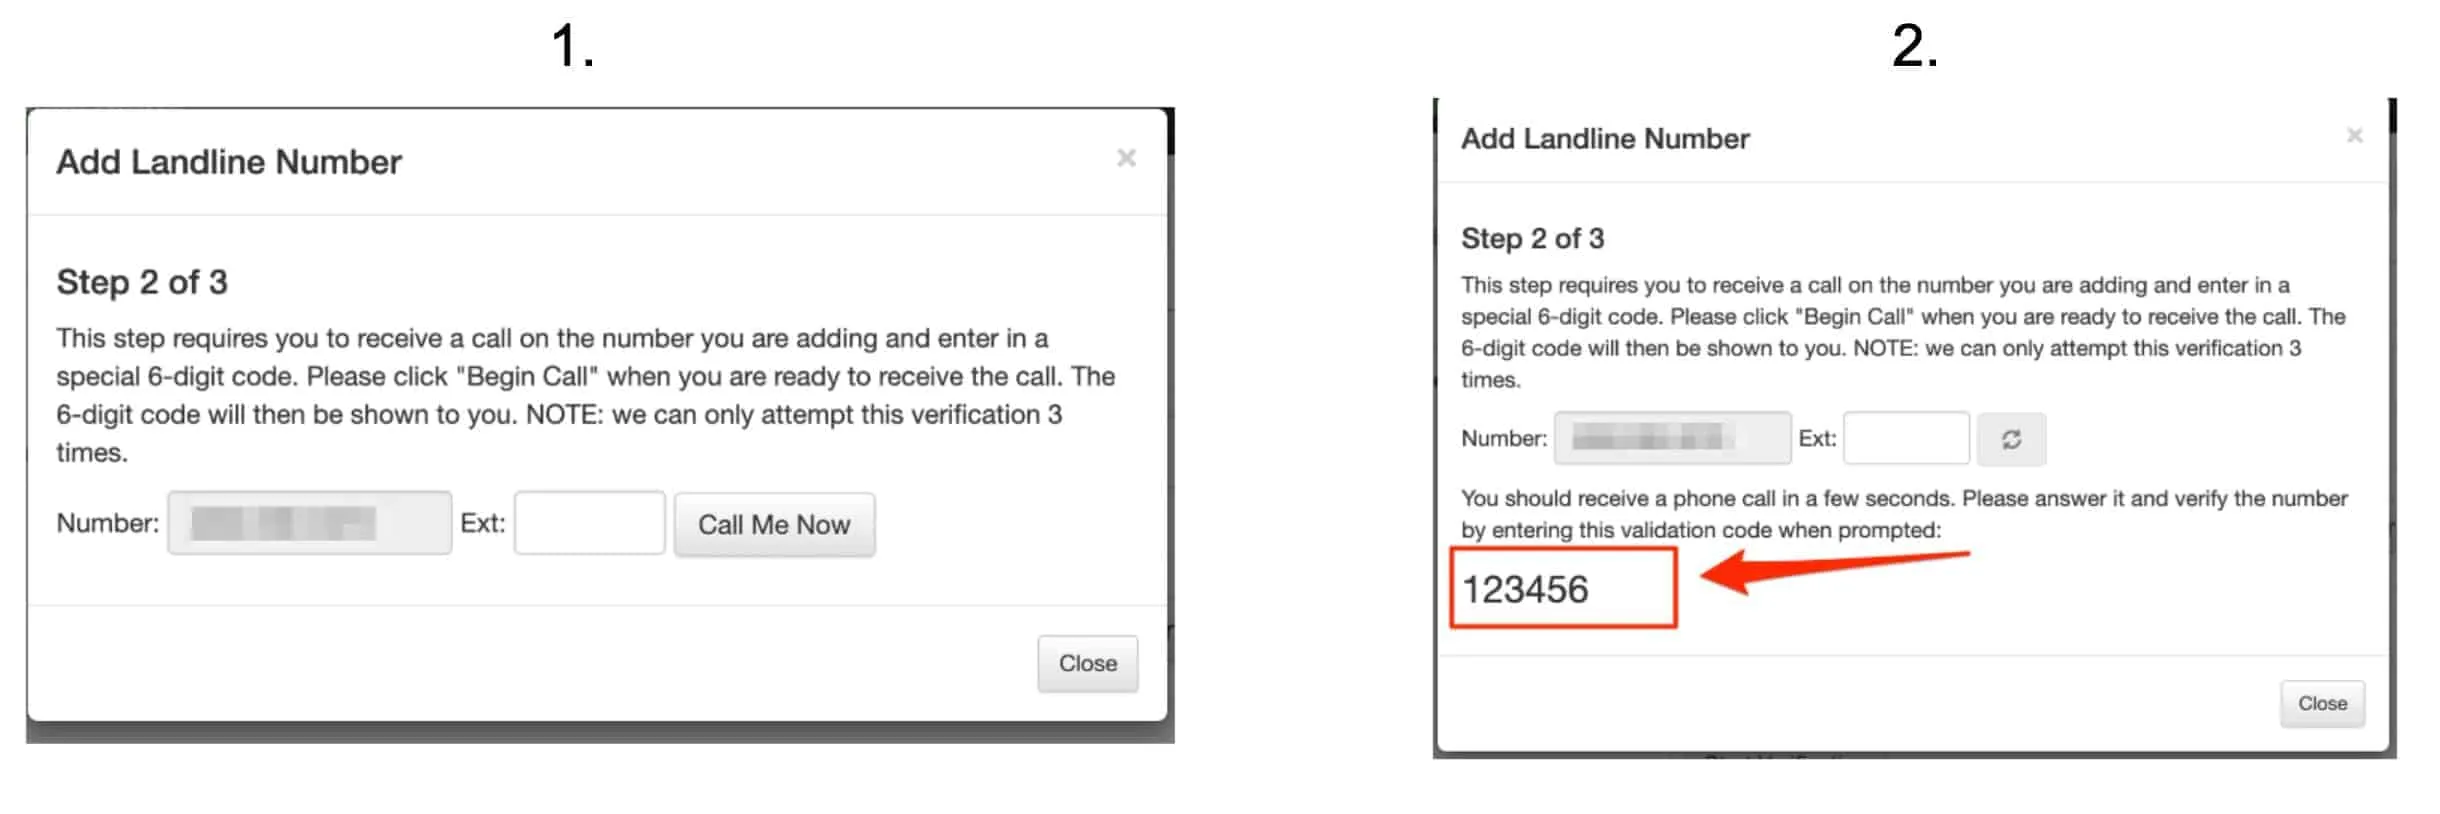
- Verify with a 6-digit code: Click Start Verification, then Call Me Now. Answer the call and enter the 6-digit code. The status updates to Verified.
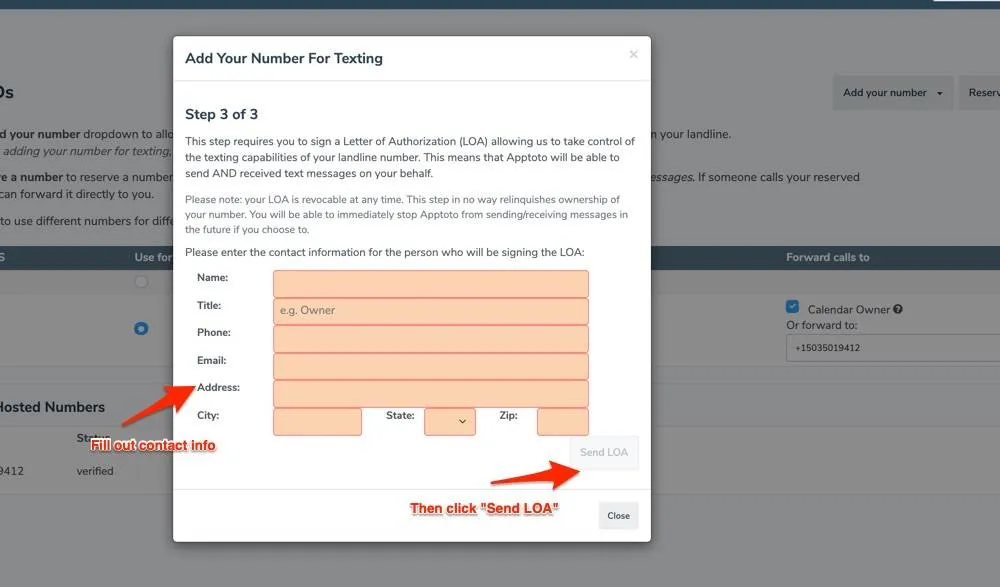
- Sign the Letter of Authorization (LOA): Click Sign LOA, fill in the contact information for the authorized signer, and click Send LOA. An email with the LOA is sent to you for signature. Status shows Pending LO until you sign.
- Carrier processing: After you sign the LOA, Apptoto submits the request to your carrier. Status changes to Carrier Processing. You receive an email when this step is complete.
- Enable the hosted number: Once carrier processing is complete, return to Settings > Caller IDs, enable the hosted number, and click Save.
