Salesforce
Connect your Salesforce account
Section titled “Connect your Salesforce account”-
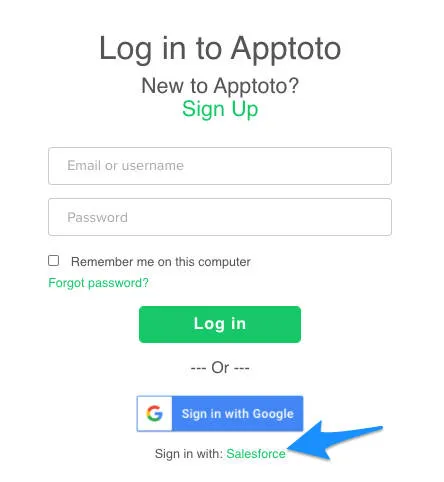
Sign up or log in with Salesforce - On the Apptoto Sign Up Page, select Sign Up with Salesforce to create your Apptoto account using your Salesforce credentials.
-
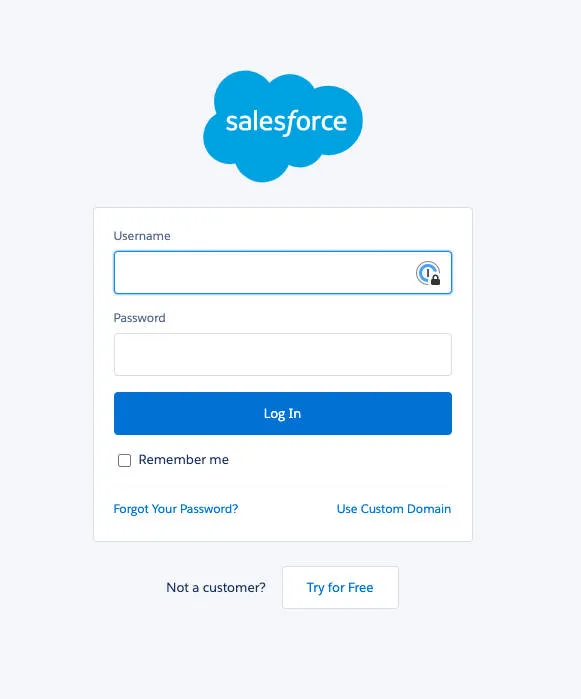
Enter your Salesforce credentials - A pop-up will appear where you enter your Salesforce login information. This allows Apptoto to sync with your Salesforce calendar.
-
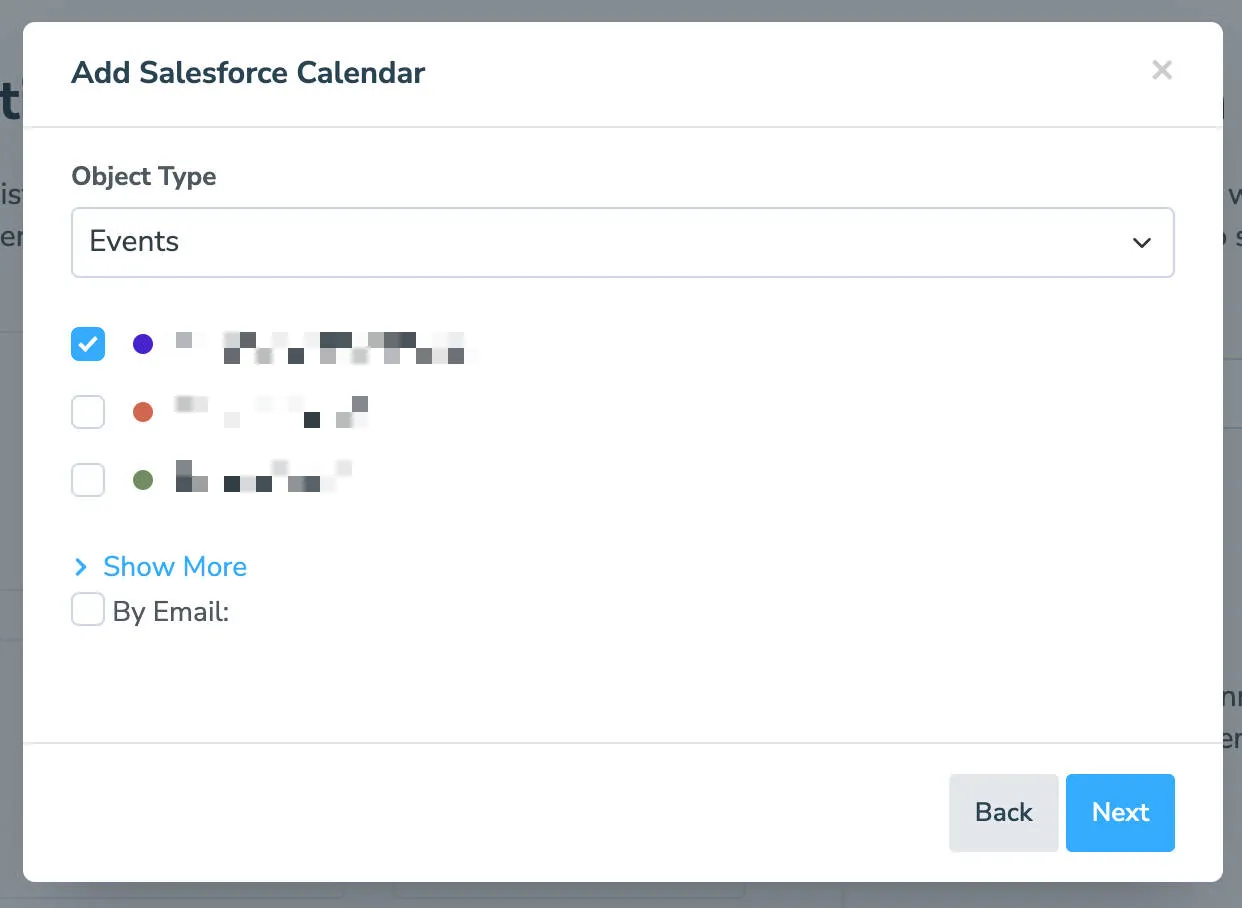
Choose your Salesforce calendar - After Apptoto verifies your login credentials with Salesforce, choose the calendar you want to connect with Apptoto. (To connect additional calendars, check the others from the list and edit individual settings later in Settings > Calendars.)
-
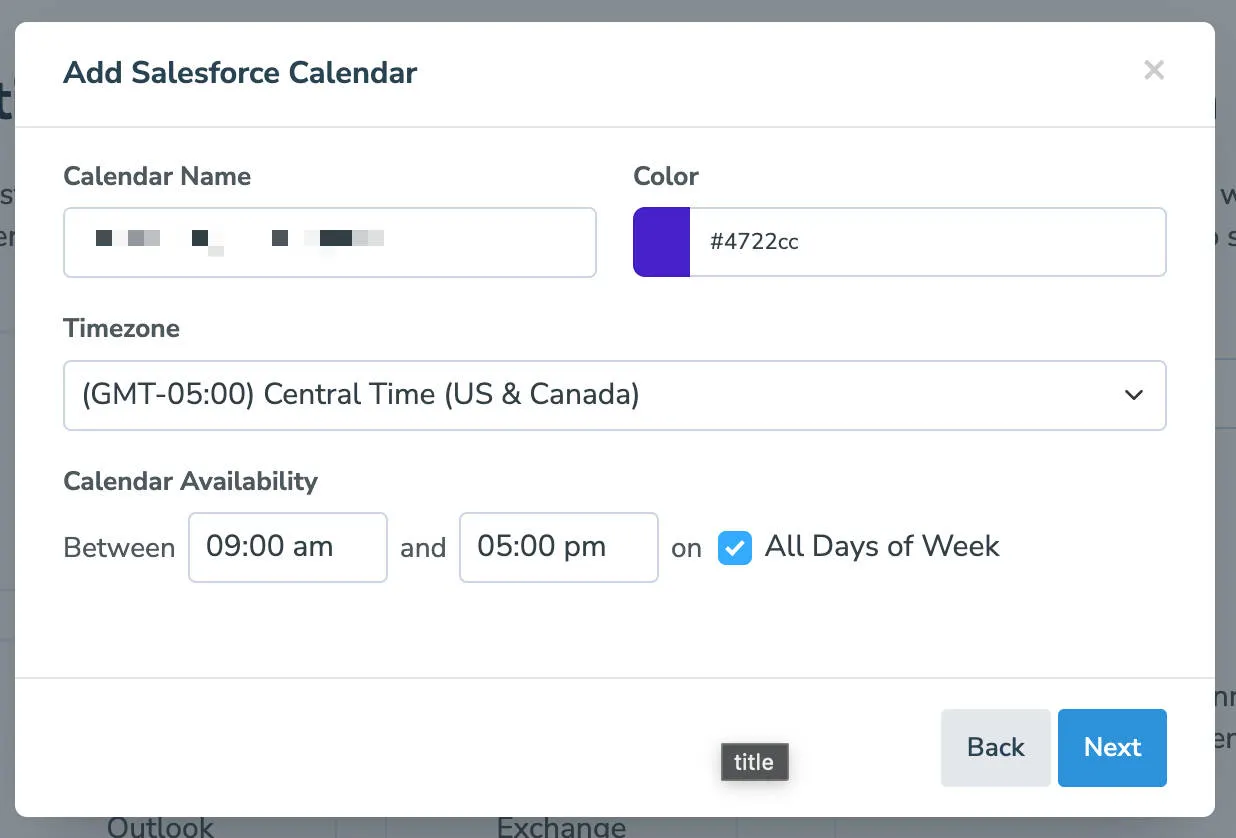
**Configure calendar settings ** - The Calendar Name and Color options are identifiers for you in Apptoto and will not impact your Salesforce calendars. By default, the Calendar Name is populated with the Salesforce name. Once you complete those prompts, set availability (relative to online booking in Apptoto) if you want to utilize online scheduling. Click Next to proceed.
-
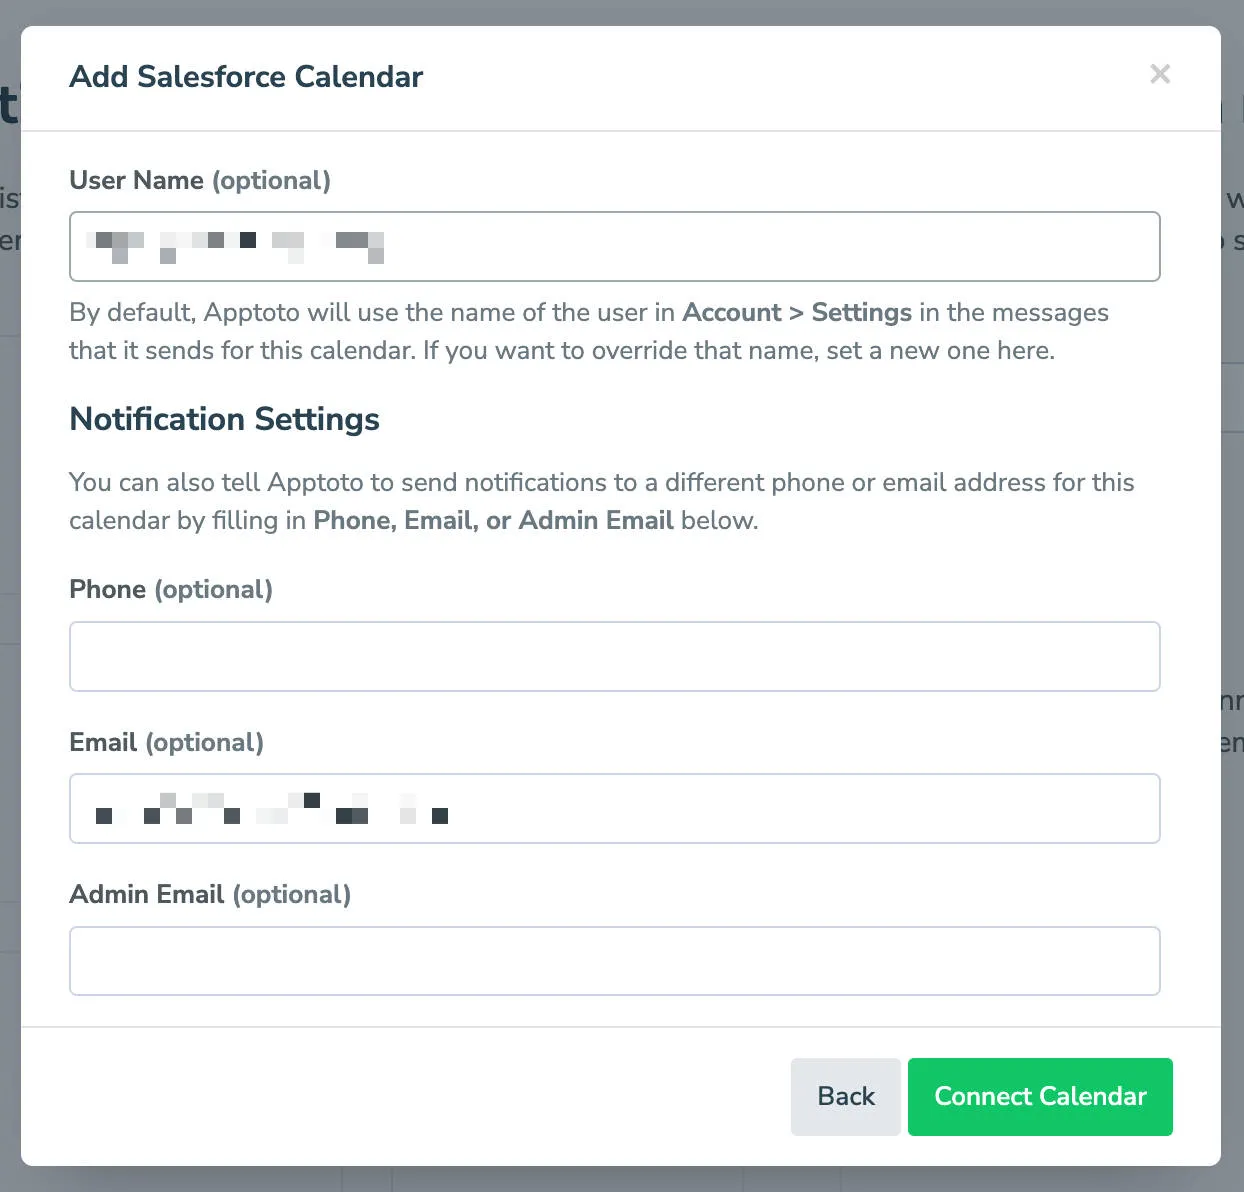
Set notification preferences - The next step allows you to set notification preferences for the individual calendar. Once complete, click Connect Calendar to connect your chosen Salesforce calendar(s) to Apptoto.
-
Test the connection - Create a test appointment in Salesforce one week from today and include your cell phone number and email address. Click the Sync button in Apptoto to pull in the new appointment immediately.

How the sync works
Section titled “How the sync works”- Apptoto syncs your Salesforce calendar once per hour automatically
- Click the sync button on the Appointments Tab to pull in changes immediately
- Apptoto extracts participant contact information from appointment records and matches it against your Salesforce contacts
Best Practices
Section titled “Best Practices”- To learn how to create and map Apptoto fields to Salesforce, see Field Mapping.
- To learn how to use Salesforce custom objects and fields in campaigns, see Custom Objects.
- For next steps on setting up appointment reminders for your Salesforce events, see Message Setup.