Appointment Reminder Statuses
Apptoto’s Appointment Reminder Statuses make it simple to scan your calendars and see if your clients have been reminded of (and confirmed) their upcoming appointments.
This feature works by updating your event titles with the appointment reminder status, which is visible only to you and your team. You can display the full status, an abbreviation, or turn it off entirely, allowing you to tailor it to your preferences.
Editing Event Titles
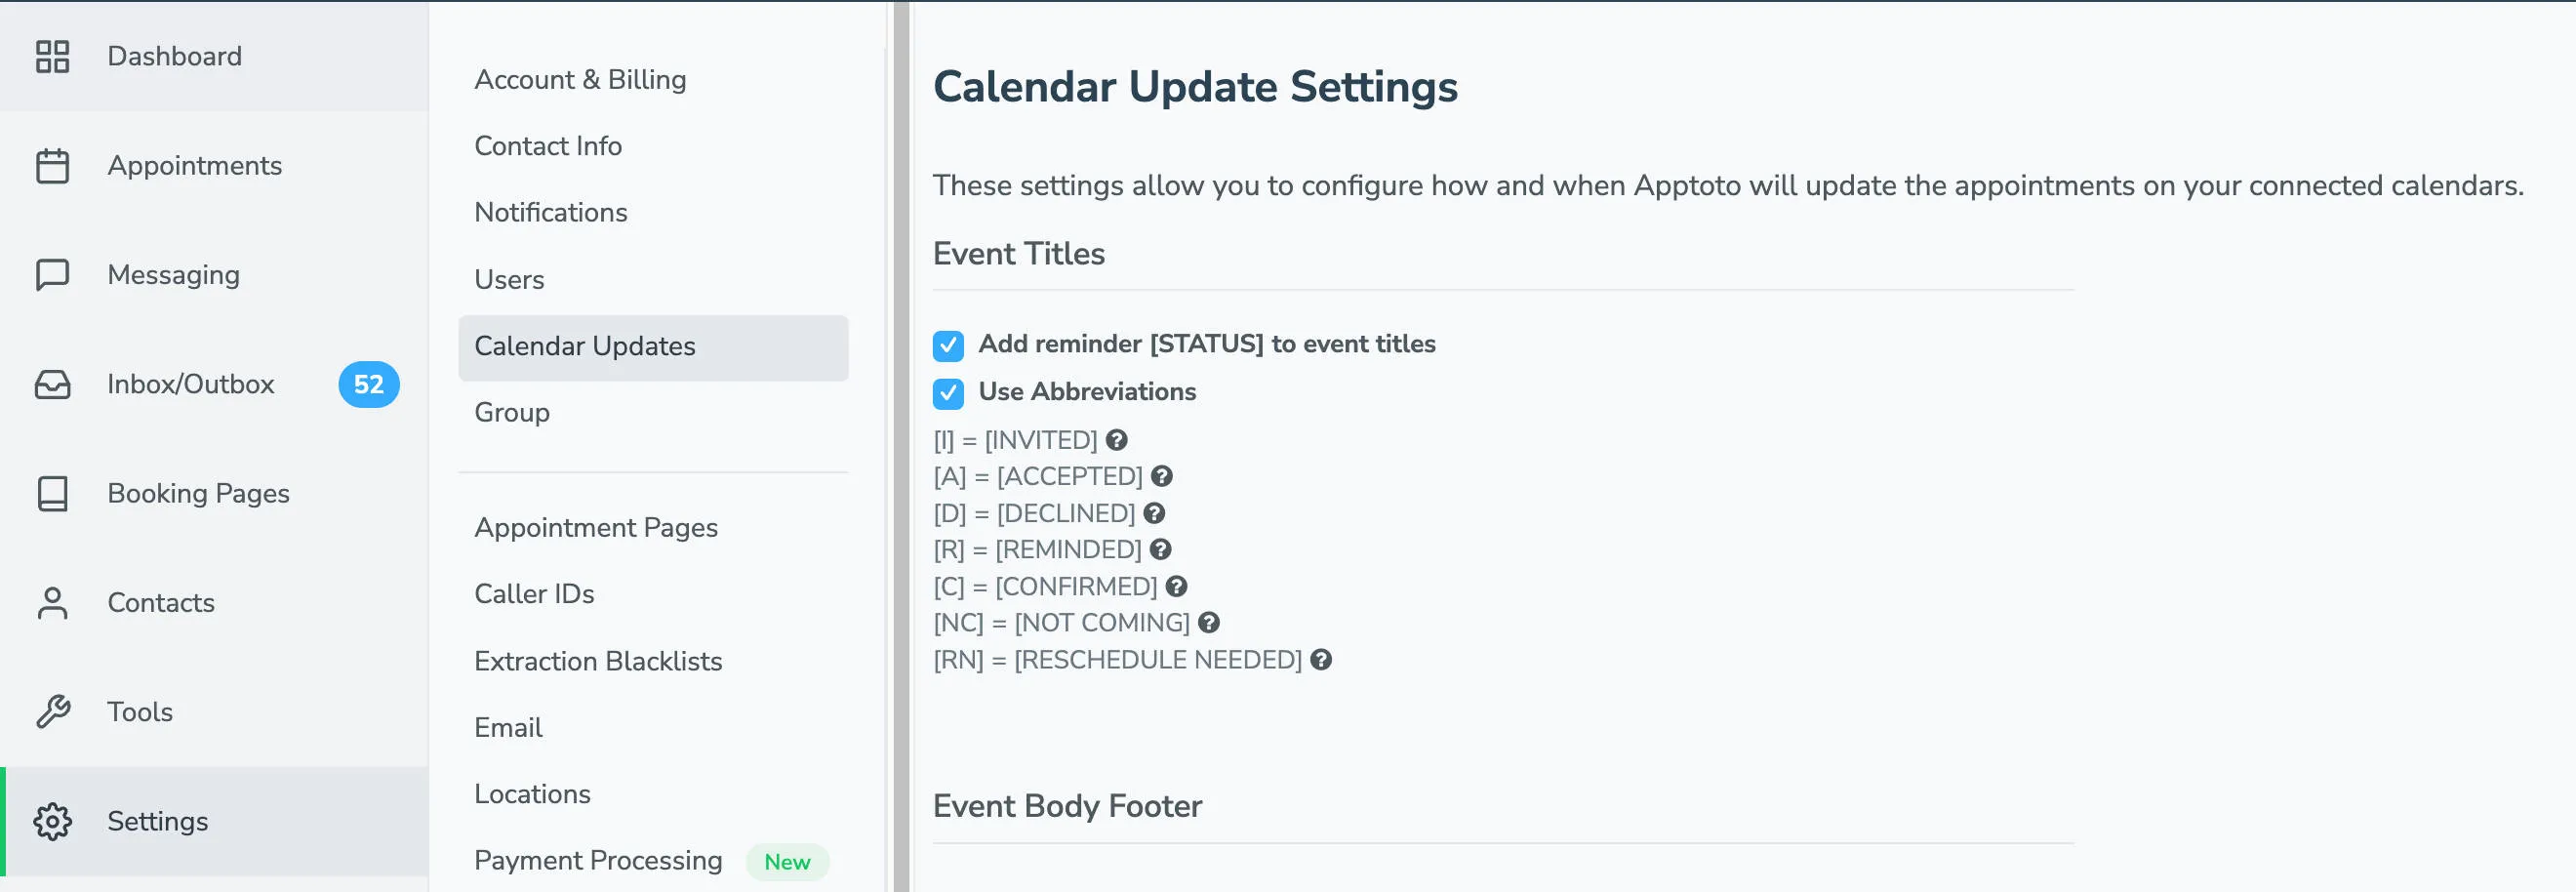
Section titled “Editing Event Titles”One of the key features of Calendar Update Settings is the ability to modify event titles to include appointment statuses. By enabling this feature, Apptoto will append or update the event titles on your synced calendar with the current status of the appointment. This helps you quickly identify the status of each appointment at a glance.
Add Reminder [STATUS] to Event Titles
Section titled “Add Reminder [STATUS] to Event Titles”When this option is enabled, Apptoto will automatically add the appointment status in square brackets (e.g., [REMINDED], [CONFIRMED]) to the event title. This feature is particularly helpful for keeping track of the actions taken by both Apptoto and your clients.
For example:
- Original Event Title: “Consultation with John Doe”
- Updated Event Title: “[CONFIRMED] Consultation with John Doe “
Use Abbreviations
Section titled “Use Abbreviations”Apptoto provides the option to use abbreviations for appointment statuses to keep event titles concise and easy to scan.
Here are the abbreviations and their meanings:
- [I] = INVITED
- A booking invitation has been sent to the client.
- [A] = ACCEPTED
- A booking invitation has been sent, and the client accepted it.
- [D] = DECLINED
- A booking invitation has been sent, and the client declined it.
- [R] = REMINDED
- Apptoto has sent at least one reminder to the client about their upcoming appointment.
- [C] = CONFIRMED
- The client has received a reminder and confirmed they will be attending.
- [NC] = NOT COMING
- The client has received a reminder, but they have canceled.
- [RN] = RESCHEDULE NEEDED
- The client received a reminder but needs to reschedule their appointment to a different time.
Examples of Abbreviated Event Titles
Section titled “Examples of Abbreviated Event Titles”Here are a few examples of how abbreviated statuses might appear in your calendar:
- “[A] Dental Cleaning – Jane Smith “
- “[RN] Team Meeting – Project Update “
- “[NC] Sales Call – Mark Brown “
How to Enable Calendar Update Settings
Section titled “How to Enable Calendar Update Settings”-
Log in to your Apptoto account.
-
Navigate to the Settings tab.
-
Locate the Calendar Update Settings section.
-
Enable the toggle for “Add reminder [STATUS] to event titles.”
-
Optionally, enable the toggle for “Use Abbreviations” if you prefer concise statuses.
-
Save your settings.
How to Change an Appointment Reminder Status in Apptoto
Section titled “How to Change an Appointment Reminder Status in Apptoto”- Log in to your Apptoto account.
- Navigate to the Appointments tab.
- Find the appointment event and hover over the attendee who’s status you want to adjust. Click the “Mark As” button that appears.
- Select an option from the drop-down for [Confirmed], [Reminded], [Not Coming], or [Needs Rescheduled]
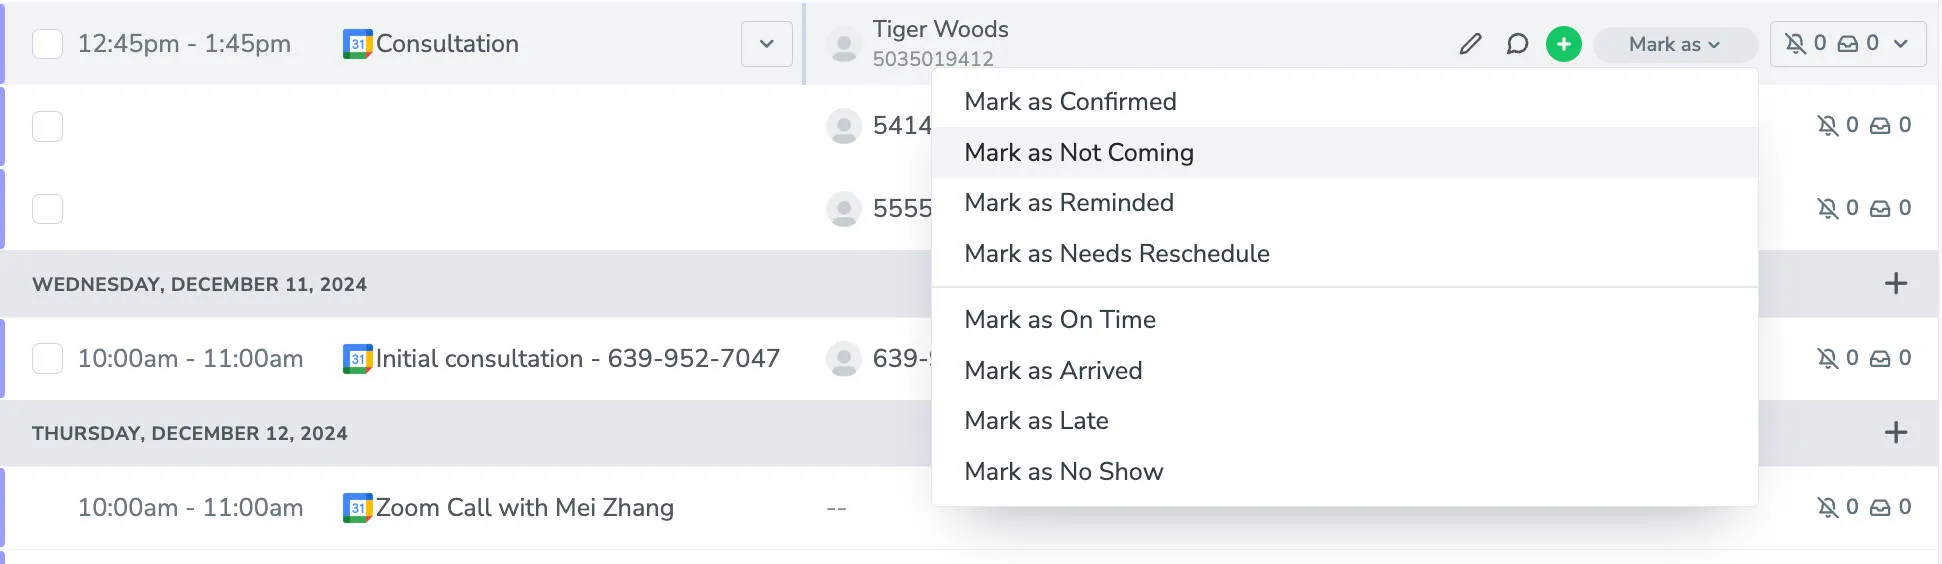
If you’d like to set a similar status for an appointment based your client’s check-in state (Arrived, On-Time, Late, No-Show), please check out our Participant Check-In States article.